 We picked up a UMAi charcuterie kit to try our hand at making some homemade DIY cured meats.
We’re old hands at homemade pork belly bacon and we have a good amount stored away in the freezer.
With the prices of meat seemingly doubling every few weeks, it pays to buy low, make now, and save for later.
So why not try our hand in making other cured meats. We’re have read about the UMAi dry aging bags and wanted to give them a try. Our first project will be pancetta.
We picked up this UMAi charcuterie kit on Amazon, check it out here. This kit has over 450 customer reviews with an average of 4.5 out of 5 stars.
So lets take a look at what’s in the package. What do you get?
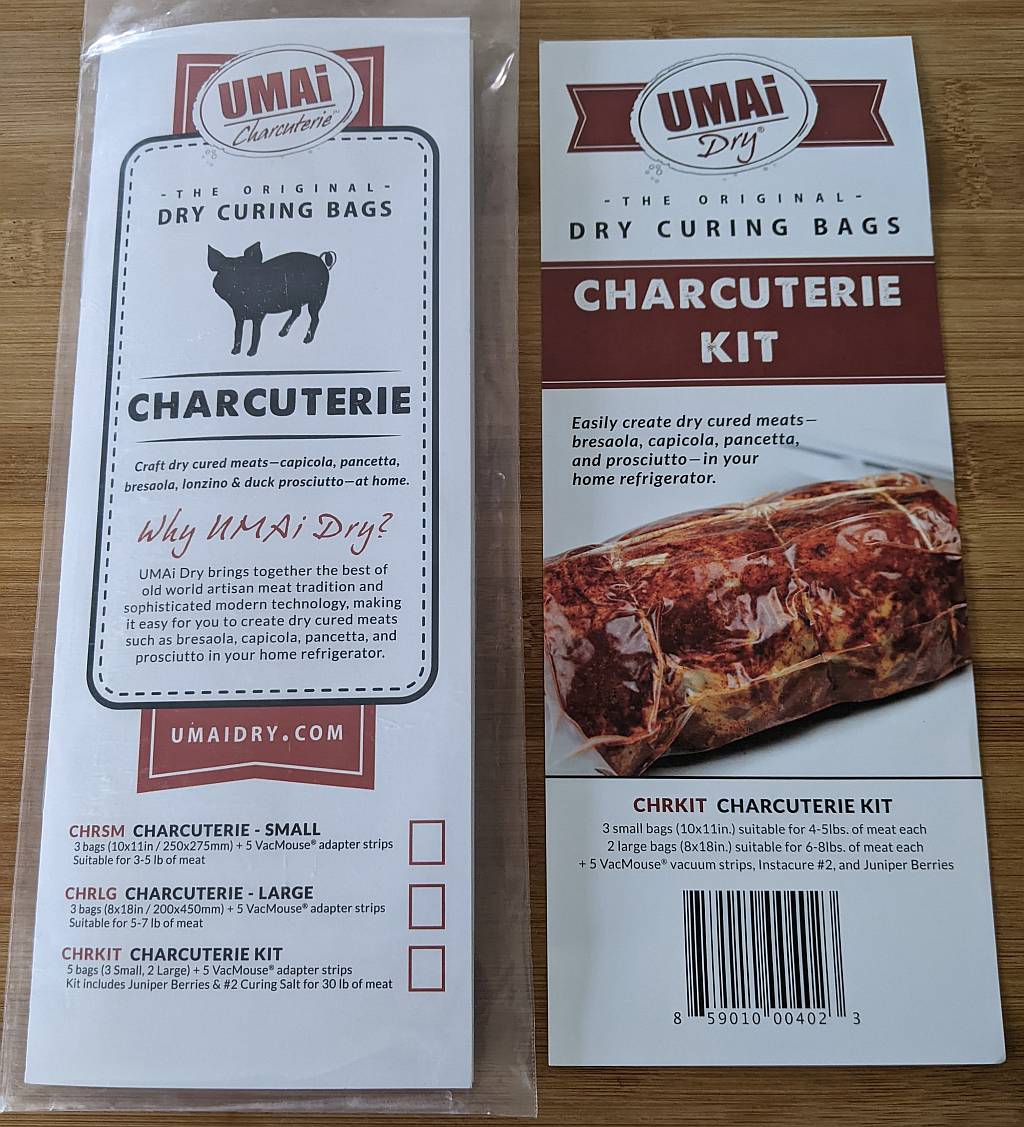
UMAi Charcuterie Kit Contents
Our kit came in a plastic pouch measuring 5 inches wide by 11 inches tall.
UMAi Charcuterie Kit Instructions and Guides
First, we received a card thanking us for our purchase which also contained the URL to the UMAi A+ Pro content with details how to use this product along with recipes.
The second item we looked at was a 12 page instruction guide with information on what to do, tips, and recipes for pancetta, lonzino, bresaola, and capicola. These recipes are also on the UMAi website.
There were also 6 handy stickers for recording the starting weight and the target weight of your charcuterie projects.
UMAi Charcuterie Kit Cure and Spices
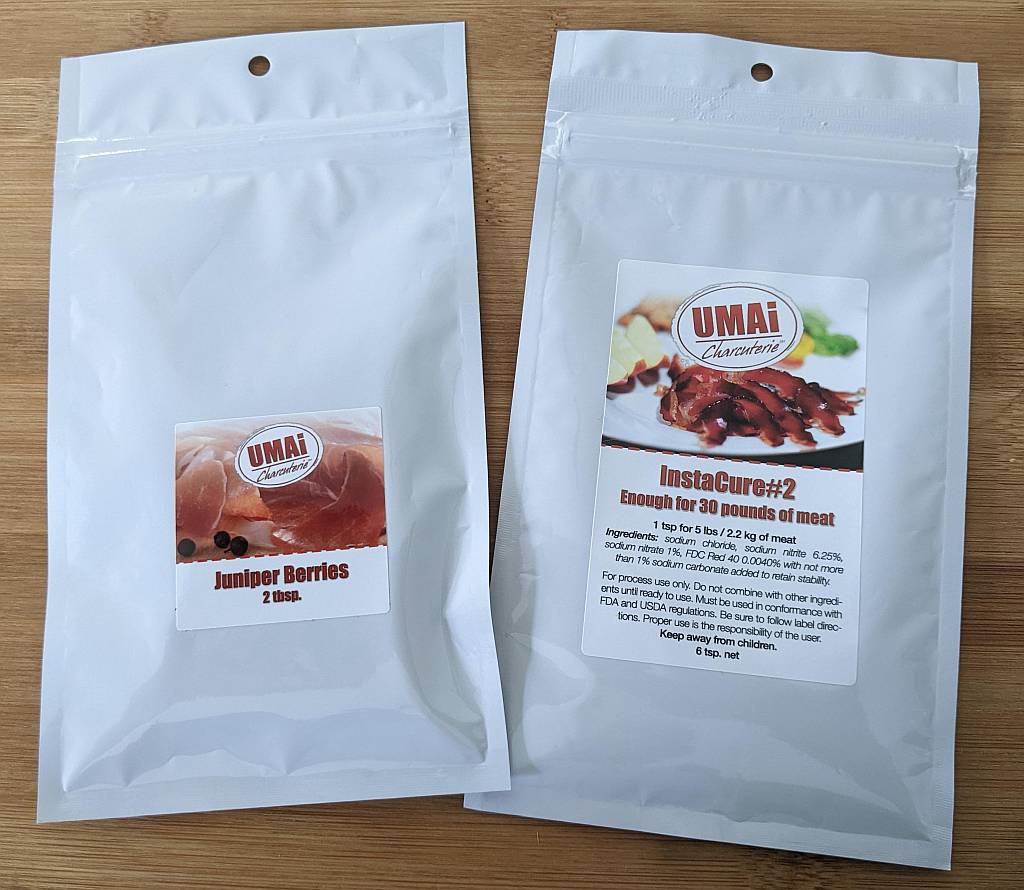
We received a packet with 6 teaspoons of InstaCure #2, enough cure for 30 pounds of meat.
We also received a packet containing 2 tablespoons of whole dried juniper berries.
UMAi Charcuterie Kit Dry Aging Bags
Next up are the actual dry aging bags. These are nothing like the zip top or food saver bags. The dry aging bag is a membrane that allows for oxygen and moisture exchange. We got 5 bags in 2 different sizes.
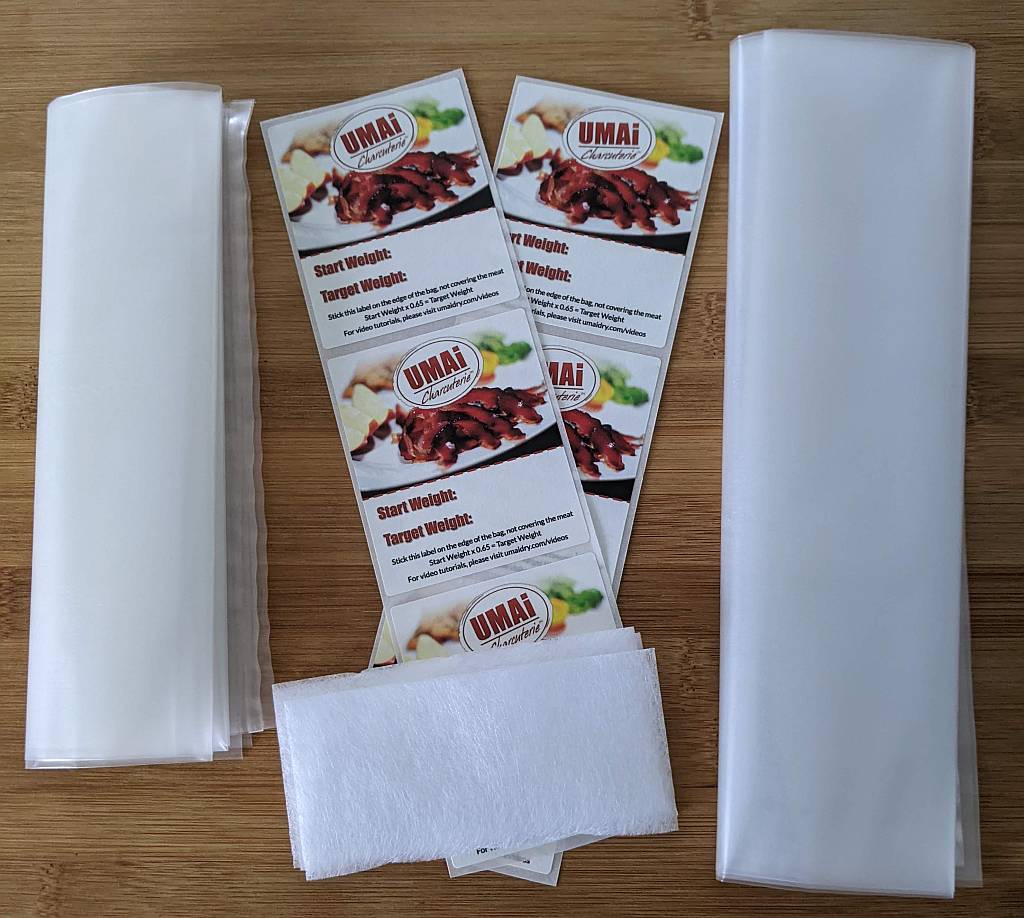
The UMAi Charcuterie kit gives you 3 small bags and 2 large bags.
The instruction card says the small bags measure 10 inches x 11 inches / 250 x 275 millimeters. Ours were a tiny bit smaller as measured. We broke out a ruler and our small bags laid out flat measured 9 3/4 inches side to side, and 10 7/8 inches top to bottom. The bottom of the bag is already sealed.
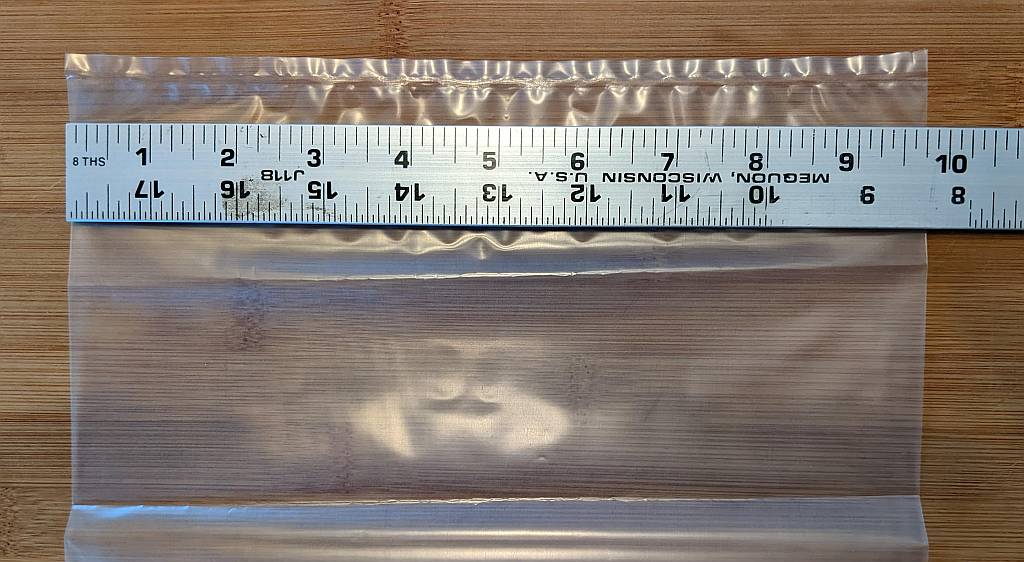

The length of the small dry age bag measures 10 7/8 inches including the seal at the bottom.
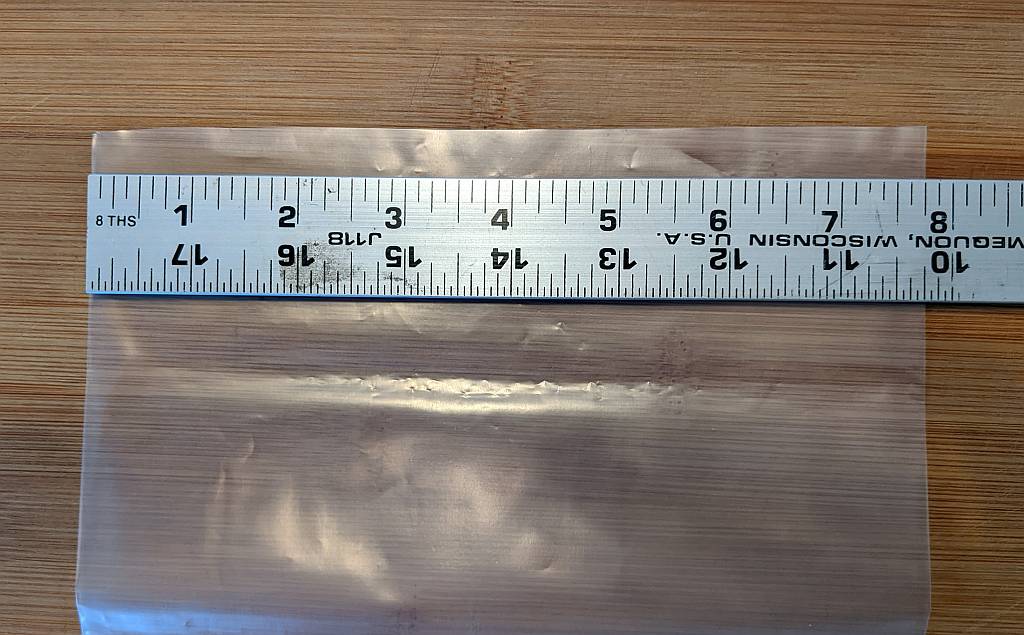
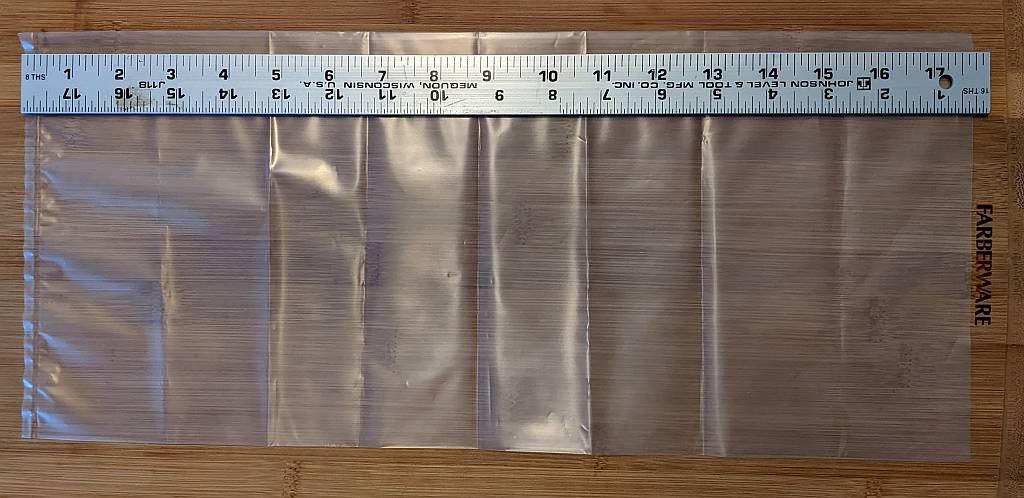
Next, the instruction card says the large bags measure 8 inches x 18 inches / 200 x 450 millimeters. Our large bags were also a bit smaller as we measured them. Our ruler shows these large bags laid out flat, measured 7 3/4 inches side to side, and 17 3/8 inches top to bottom. The bottom of the bag is already sealed.
Lastly, we received thin foam rectangles called a VacMouse for use with a vacuum sealer.
Amazon Customer Comments
We always review the customer comments to see what folks have to say about a product. There were two categories of complaints we saw.
Not so surprising, a number of reviewers said these bags were too small for dry aging their steaks. We are looking at the UMAi Charcuterie Kit, which is for making charcuterie items and not dry aging large items like steaks. That is another product offering. One that we do want to try later.
Other folks had problems sealing the bags and didn’t give any further information. The instructions are clear on what to do here. These UMAi dry aging bags are not like a food saver vacuum bag and work differently.
Our First Project
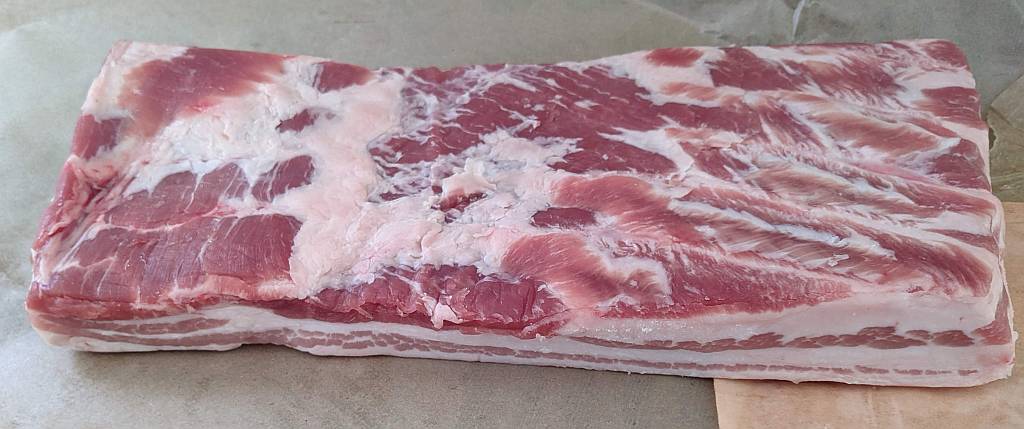
For our first charcuterie project we will use pork belly to make a flat dry cured pancetta (pancetta stesa). A pancetta can be flat or round (pancetta arrotolata).
Also, to keep things simple, we decided to use the recipe on the UMAi website and adjust for the weight of our pork belly.
A digital kitchen scale is a must-have for this project to calculate the amount of InstaCure #2 needed to safely cure the pork.
We’ll also need a 2 gallon zip top bag.
Measuring Out the Critical Ingredients
We are starting with a 2.77 pound / 1245 gram pork belly, measuring 6 inches at the widest point and 11 1/2 inches in length. We weighed the pork belly on our handy digital kitchen scale.
Referring to the UMAi instructions, for a 1245 gram pork belly, we would need 3.11 grams of the InstaCure #2.
It is important to get the correct ratio of curing salts to meat weight for protection against food borne illness.
Our digital scale didn’t measure fractions of a gram, so we ended up using just at 4 grams of InstaCure #2. So at 3 grams of scale weight, I just added a few sprinkles of InstaCure #2 at a time until the scale ticked over from 3 to 4 grams. Close enough and probably going just a tad bit over the .25% of the pork belly weight.
Before our next charcuterie project kicks off, I’ll need to find a digital kitchen scale that will measure increments of a gram.
Next, we weighed out 38 grams of kosher salt, which is 3% of the meat weight.
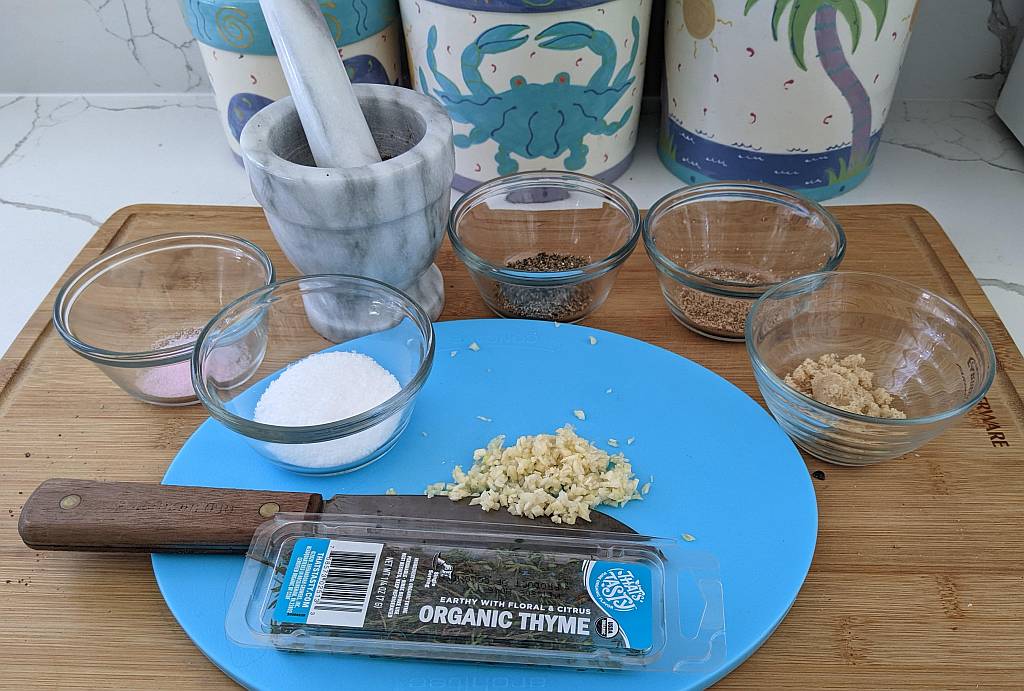
Homemade Pancetta Ingredients
This is the list of ingredients we used for our 2.77 pound / 1245 gram pork belly. We substituted light brown sugar for the dark brown sugar in the UMAi recipe because we had half a box in the pantry and didn’t want to buy more.
Garlic, minced, 3 cloves
Light brown sugar, 1 tablespoon
Fresh ground black pepper, coarse grind, about 1 1/2 tablespoons
Juniper berries, crushed, about 1 tablespoon
Bay leaves, crumbled 2
Nutmeg, freshly grated, about 3/4 teaspoon
Fresh thyme, 5 springs
InstaCure #2 (0.25% of meat weight), 3.11 grams
Kosher salt (3% of meat weight) 38 grams
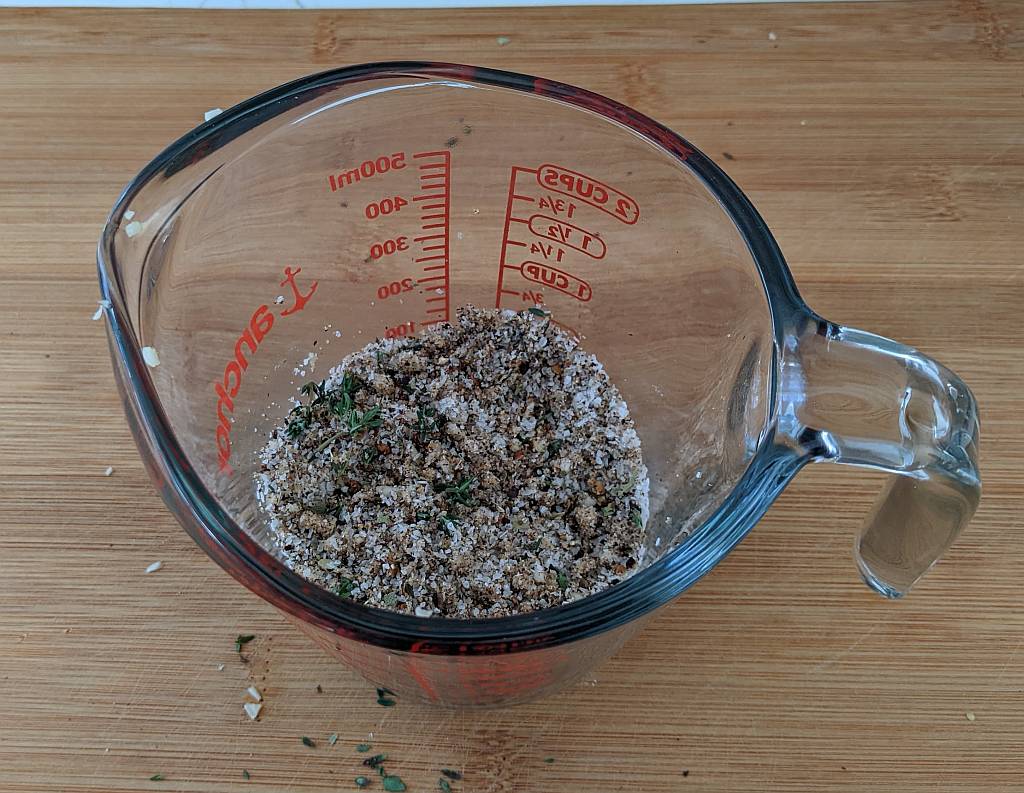
To begin, we used a mortar and pestle to crush the juniper berries and the bay leaves. Then we stirred and mixed together all of the ingredients into a measuring cup. We have a bit over 1/2 cup of the cure / seasoning mix.
Homemade Pancetta Ingredients
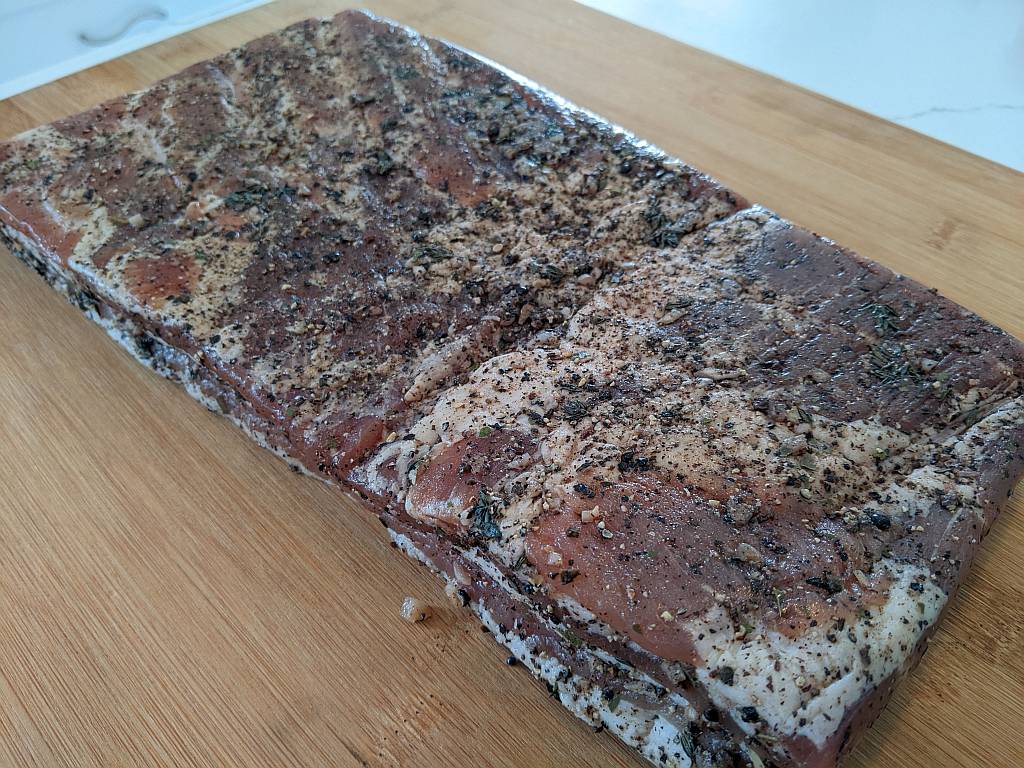
On a clean cutting board, we rubbed the pancetta seasoning mixture all over the pork belly.
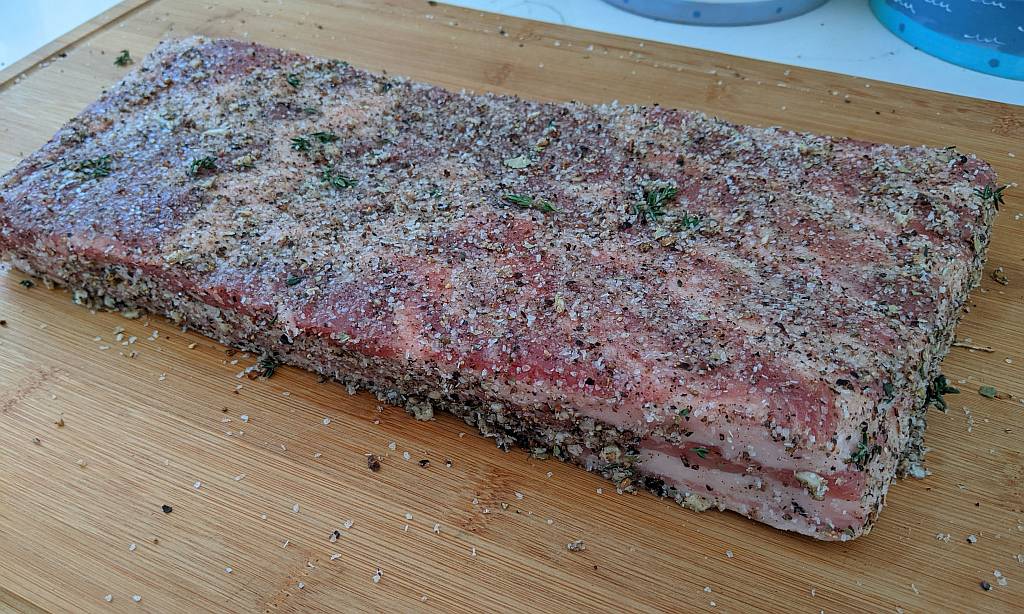
Coating the top, bottom, the sides and edges.
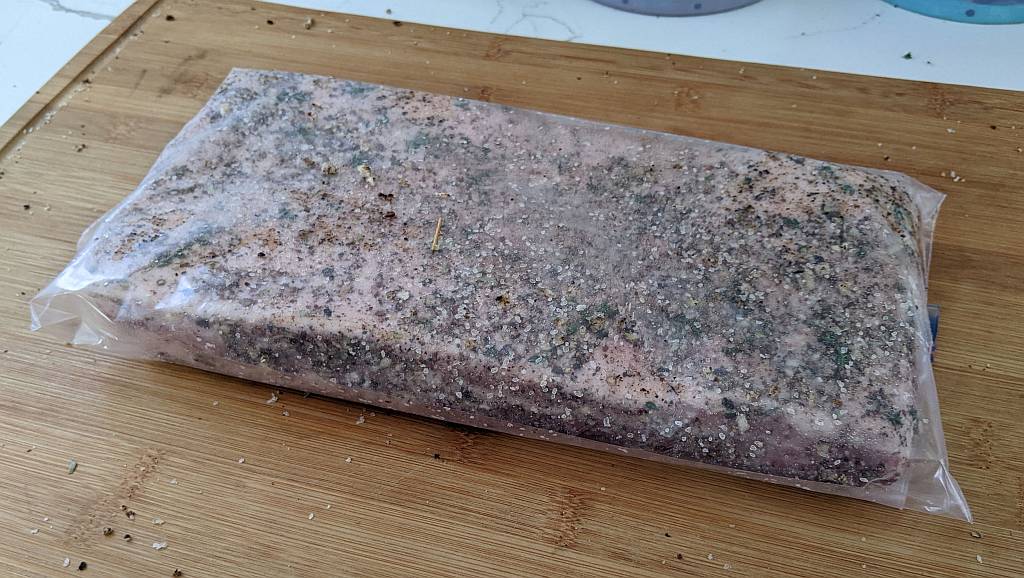
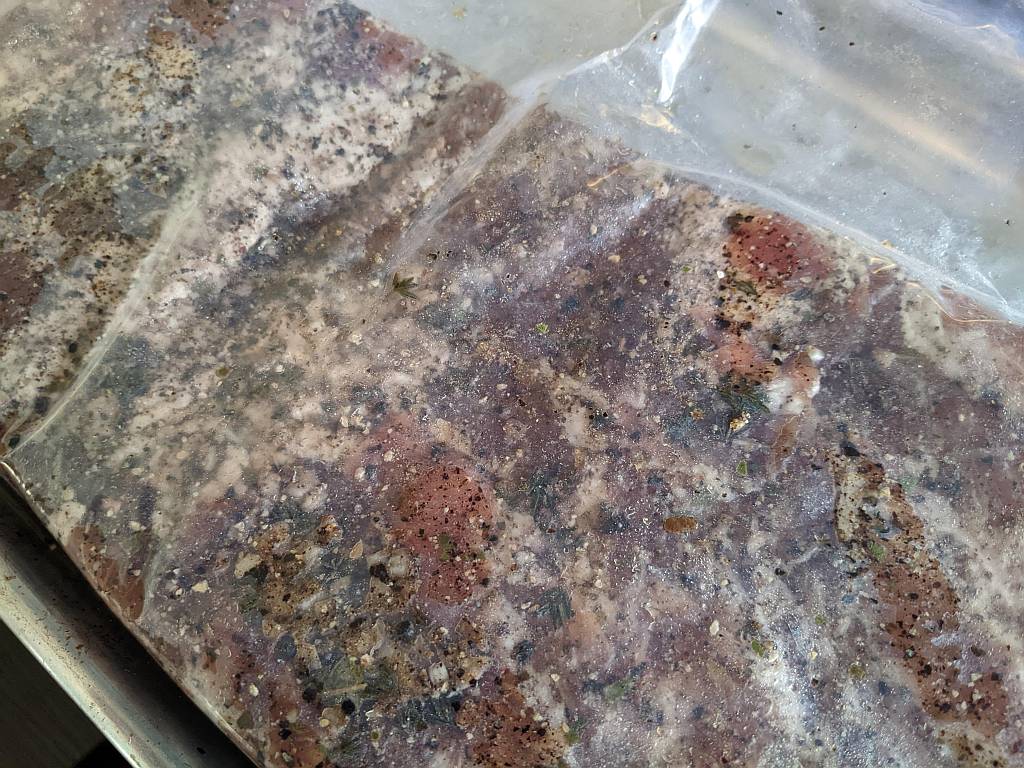
Lastly, we put the pork belly into the zip top bag with all the remaining seasoning scraped off the cutting board. Then we squished out all the air pockets and bubbles and sealed the bag.
We folded the zip top bag so the seal was on top to minimize any chance of leakage. We also put the bag on a quarter sheet pan. Then the whole thing went into the refrigerator.
The Pork Belly Curing
It’s Saturday, February 19, 2022. So the UMAi pancetta recipe instructions says we need to let the pork belly cure in the fridge for 14 days, turning every couple of days to maintain an even coverage of the cure mix over the surface of the meat.
Sunday, February 20, 2022. Flipped over the bag. There is a small amount of liquid inside the bag. Maybe a teaspoon or so at the most. This liquid, or brine is expected.
Saturday, February 26. Day 7. The pork belly feels somewhat more firm than last Saturday when I put it in the refrigerator. We have been flipping it every day, once a day.
Wednesday, March 2. Day 11. Just 3 days to go. The pork belly looks good. Continuing to flip the zip top bag every day, once a day.
Next Steps
Today is the big day, day 14. Time to break out the UMAi charcuterie kit dry age bags and one of the VacMouse inserts.
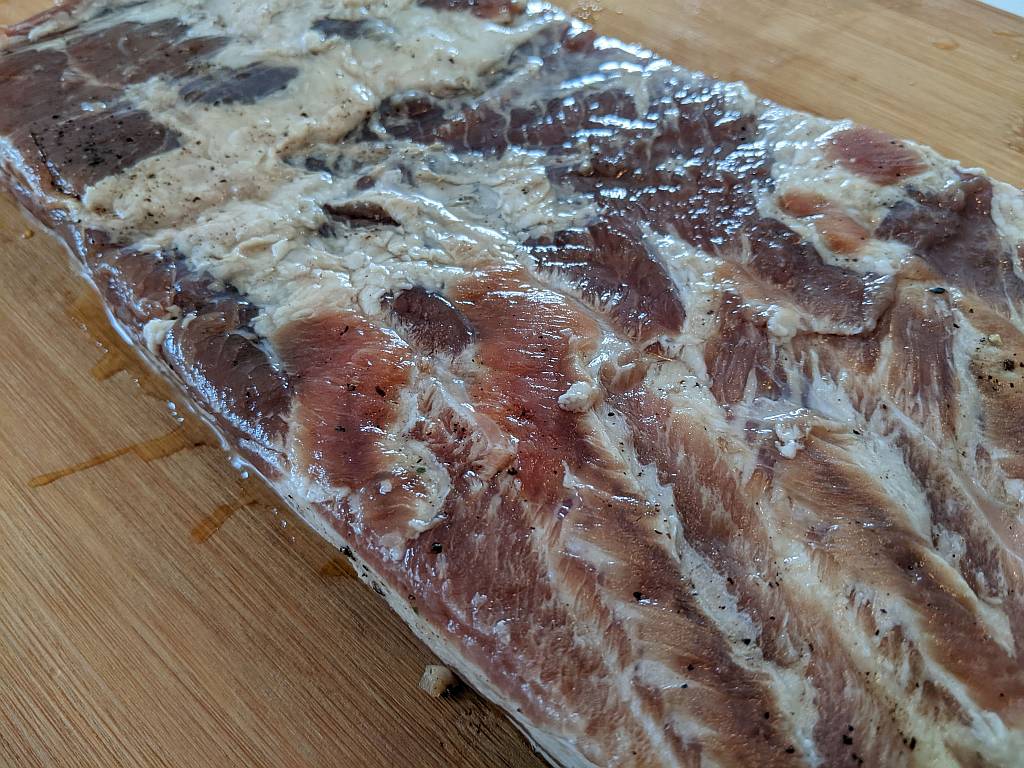
First, we cold water rinsed off the pork belly. Hint: we highly recommend a sink strainer if you don’t already have one. You don’t want all of that cure running down your pipes potentially creating a clog. We’re working on our homemade pancetta today and not unclogging sink drains.
Second step was to cuff the large size charcuterie dry bags (8 inches x 18 inches / 200 x 450 millimeters) to keep the opening somewhat clean and dry for later sealing.
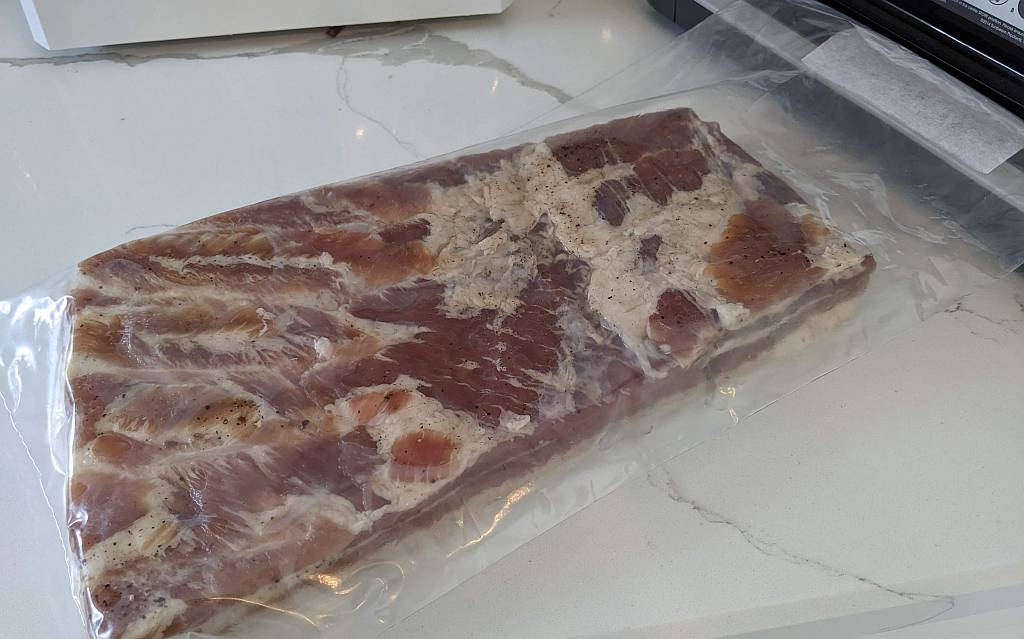
Next, we slid in the rinsed off pork belly. We did not dry off the pork belly, it was still pretty wet from the rinsing. The UMAi pancetta video said the moisture helps the bag better adhere to the meat.
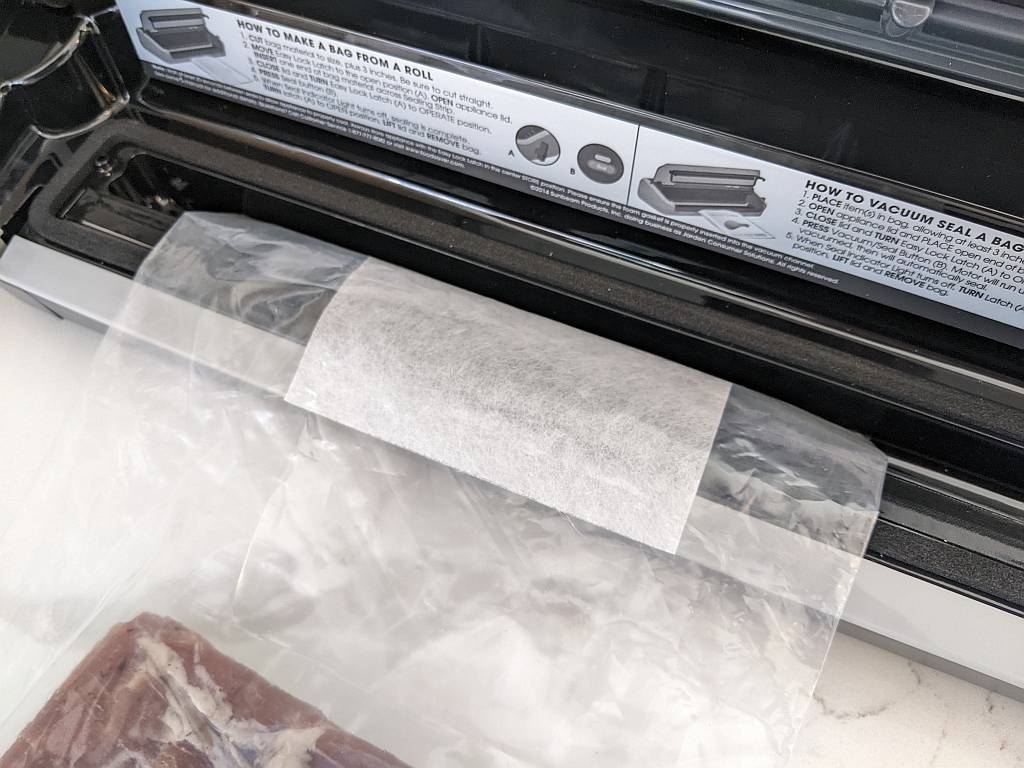
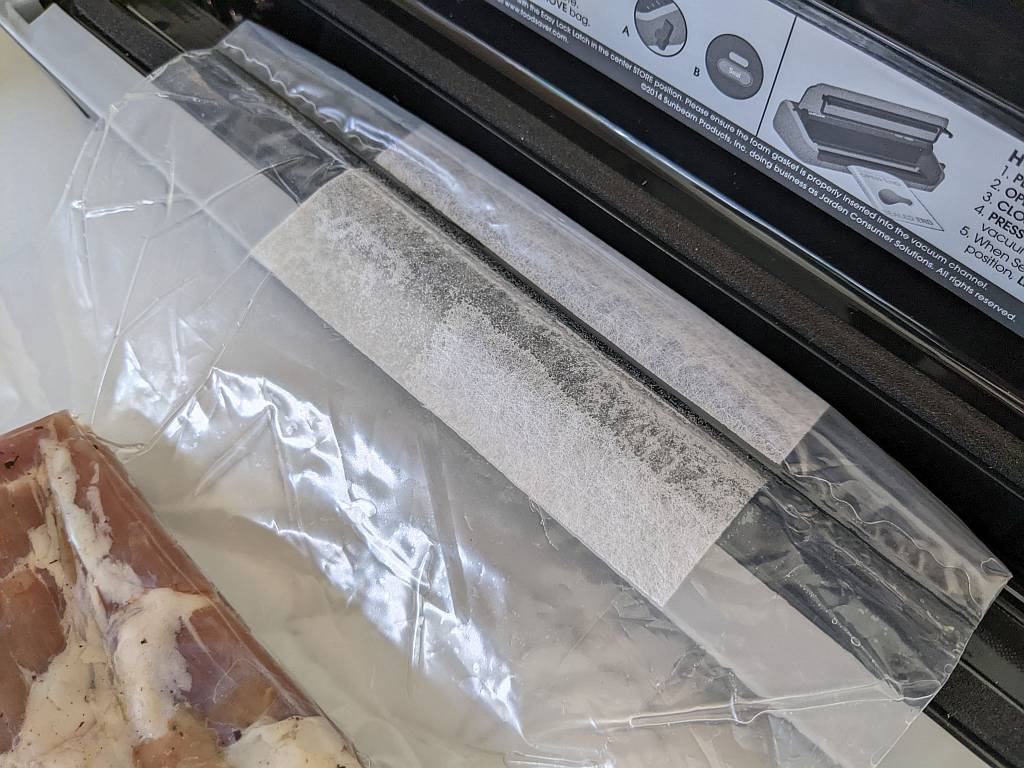
Lastly, we use our FoodSaver vacuum sealer to vacuum down the bag and seal it. The VacMouse was inserted into the bag, and we vacuumed out what air we could and sealed. In hindsight, I would have sealed the dry bag a bit further away from the opening. Then we created the second seal right at the end of the bag.
The starting weight is 1315 grams. Looking again at the instructions, the meat should lose between 35% and 40% of its weight over 30 to 120 days. So the finished weight would be somewhere between 789 and 855 grams.
Your Patience Will Be Rewarded
Go ahead and try your hand at some DIY pancetta. We picked up this UMAi charcuterie kit on Amazon, check it out here. This kit has over 450 customer reviews with an average of 4.5 out of 5 stars.
Now we watch and wait. So stay tuned for the pancetta project and the results.
| Date | Days in UMAi dry age bag | Weight (grams) | Loss (grams) | Lower range (460 grams) | Upper range (526 grams) |
|---|---|---|---|---|---|
| March 6, 2022 | 0 | 1315 | 0 | 460 | 526 |
| March 12, 2022 | 7 | 1171 | 144 | 316 | 382 |
| March 19, 2022 | 14 | 1081 | 90 | 226 | 292 |
| March 21, 2022 | 21 | 1023 | 58 | 168 | 234 |
| April 2, 2022 | 28 | 988 | 35 | 133 | 199 |
| April 9, 2022 | 35 | 959 | 29 | 104 | 170 |
| April 16, 2022 | 42 | 941 | 18 | 86 | 152 |
| April 23, 2022 | 49 | 924 | 17 | 69 | 135 |
| April 30, 2022 | 56 | 911 | 13 | 56 | 122 |
| May 7, 2022 | 63 | 899 | 12 | 44 | 110 |
| May 14, 2022 | 70 | 890 | 9 | 35 | 101 |
| May 21, 2022 | 77 | 883 | 7 | 28 | 94 |
| May 28, 2022 | 84 | 876 | 7 | 21 | 87 |
| June 4, 2022 | 91 | 871 | 5 | 16 | 82 |
| June 11, 2022 | 98 | 868 | 3 | 13 | 79 |
| June 18, 2022 | 105 | 867 | 7 | 6 | 72 |
| June 25, 2022 | 112 | 856 | 5 | 1 | 67 |
| July 2, 2022 | 119 | 853 | 3 | 64 |
March Timeline
It’s Saturday, March 12, and day 7 of our pancetta dry curing inside the large size UMAi dry age bag. The vacuum still looks good and the bag is still against the meat surface. The pancetta feels a bit firmer. The weight is now 1171 grams. So the pancetta has lost 144 grams of weight so far over the past week. This means that we have between 316 and 382 grams of weight loss to go over the next 23 – 113 days.
We’re 1 month into our DIY pancetta project, it’s Saturday, March 19 and day 14 curing inside a UMAi dry age bag. The pancetta weighed in at 1081 grams this morning. The DIY pancetta has lost another 90 grams, the total lost weight lost so far is 234 grams in 2 weeks. It needs to lose between 226 and 292 grams over the next 17 – 107 days.
Saturday, 19 March 2022. It has been 13 days, weight 1081 grams, another 90 grams lost, total lost is 234 grams. Needs to lose between 226 and 292 grams over the next 17 – 107 days. Need to try and flip it more and open and close the fridge. It’s been 1 month since I started this project. The bag is starting to loosen up a bit from the edges of the pancetta.
Saturday, 26 March 2022. It has been 21 days now and the weight is down to 1023 grams, just 58 grams lost this past week. So total weight lost is 292 grams or 22% of the starting weight. The DIY pancetta needs to lose between 168 grams and 234 grams over the next 10 – 100 days. The pancetta feels firm and the meat is definitely darker in color, a deep red color. It is also pretty thin in the middle and thicker on the edges. I can see why it gets rolled into a cylinder. So with less moisture in the pancetta, I suspect the moisture loss will be decreasing each week. Moved the pancetta to the main refrigerator that gets opened and closed multiple times a day.
The UMAi dry age bag is still attached to the top and the bottom of the pancetta. However, it has loosened and is not attached to the sides of the pancetta. The directions does say this is normal and to be expected.
April Timeline
Saturday, 02 April 2022, it has now been 28 days, the weight is now down to 988 grams, so there has been another 35 grams of weight lost this week, not really all that much. So the total weight loss is 327 grams or 24.8% of the starting weight. It needs to lose between 133 grams and 199 grams over the next 3 – 93 days. That would be around July 4th.
Saturday, 09 April 2022, it is now 35 days, just over a month of dry curing time, the weight is now down to 959 grams. That is 29 grams lost since last Saturday. The amount of weight loss really slowing down. So we have now lost a total of 356 grams, or 27% of the starting weight. We should lose at least 104 more grams, if we can wait that long.
Saturday, 16 April 2022, now at day 42, the weight is now at 941 grams. That is 18 grams lost since last week. We have now lost a total of 374 grams and now 86 grams from the target weight of 460 grams of weight loss. So we have 78 more days to hit the 120 day, or 11 weeks.
Saturday, 23 April 2022, weight is now at 924 grams. So that is 17 grams lost since last week. We have now lost a total of 391 grams. That puts us at 69 grams from the target weight of 460 grams of weight loss. I hesitate to say just 69 grams since the curing process is painfully long. Also, we are now 71 days from the 120 mark, or now, 10 weeks. Really hoping it sooner than that. If we stay at 15-17 grams per week, then we are looking at 4 to 5 more weeks of curing time in the refrigerator.
Saturday, 30 April 2022, the weight is now down to 911 grams. Okay, so just 13 grams down since last week. Two sugar packets weight about 10 grams. The rate at which we are dropping grams has really slowed down. Also, the pork belly is really firmed up and board stiff. It’s hard to believe that we started this project on February 14, We are now 76 days into this project with 56 to go if we take the entire 120 days.
May Timeline
Saturday, 07 May 2022, @ 1600, weight is now at 899 grams. Finally dropped below 900 grams, albeit by just 1 gram. Since last Saturday, the DIY pancetta lost 12 more grams of weight. We are now 44 grams away from our target weight of 460 grams.
Saturday, 14 May 2022, the weight is now down to 890 grams when measured at 0912. Lost 9 more grams of weight over the past week. Boy, the curing weight loss timeline sure has slowed way down. We’re probably looking at another month at least to lose 35 more grams … if we can wait that long. The pancetta stesa is very stiff and dense, just like a plank board.
Saturday, 21 May 2022, another week has gone by and the pancetta is now down to 883 grams. Over the past week, just a mere 7 grams of weight loss, about the same wight as a sugar packet. We have 28 grams left to go to meet the minimum weight loss threshold of 460 grams. Curiosity is getting to me, so I might not be able to wait that final 28 grams of weight loss.
Saturday, 28 May 2022. The pancetta is now down to 876 grams. However, I was really expecting to see something like 4 or 5 grams instead. If it was just 4 or 5 grams, I was going to call it a day and cut open the bag for a taste test. So there is now light at the end of the tunnel as the saying goes. I’m giving it until the July 4th weekend to finish it out. That should be plenty of time drop to is minimum final weight of 855 grams. So its now time to think of the next charcuterie or dry aging project?
June Timeline
Saturday, June 4, 2022. The pancetta weighed in at 871 grams this morning. I am really getting impatient and really want to give this a taste test.
Saturday, June 11, 2022. Okay, the DIY pancetta has weighed in at 868 grams. This week next to nothing on weight loss. As this project continues, the pancetta loses less and less weight, as a percentage. But we are calling it done on the July 4th weekend.
Saturday, June 25, 2022. Weight 856 grams. The digital kitchen scale was cycling between 855 and 856 grams. A second attempt at weighing gave us a stable 856 grams, so we went with that. It is very close to the 35% minimum weight loss, within 1 gram. So next Saturday, July 2nd, we will call this pancetta done. We’ll get a final weight and get some pictures. Looking forward to giving it a taste.
Saturday, 18 June 2022. Weight 861 grams. I measured twice and several hours apart just to be sure. But, sure enough, both times the pancetta weighed in at 861 grams. I was expecting 2 or 3 grams. So why did the weight drop by 7 grams? The outside temperature was really warm, we had several days in the upper 90’s, high humidity, with a feels like temperature exceeding 100 degrees. Perhaps the fridge was running more, not sure?
Saturday, 25 June 2022. Weight 856 grams. The digital kitchen scale was cycling between 855 and 856 grams. A second attempt at weighing gave us a stable 856 grams, so we went with that. We’re getting very close to that 35% minimum weight loss. So next Saturday, July 2nd, we will call this pancetta done. Looking forward to getting some updated pictures and giving this a taste test.
July Timeline
Saturday, 2 July 2022. Weight 853 grams. So I am slightly past the 35% weight loss threshold. Today is the day to remove it from the UMAi dry age bag and give it a try.
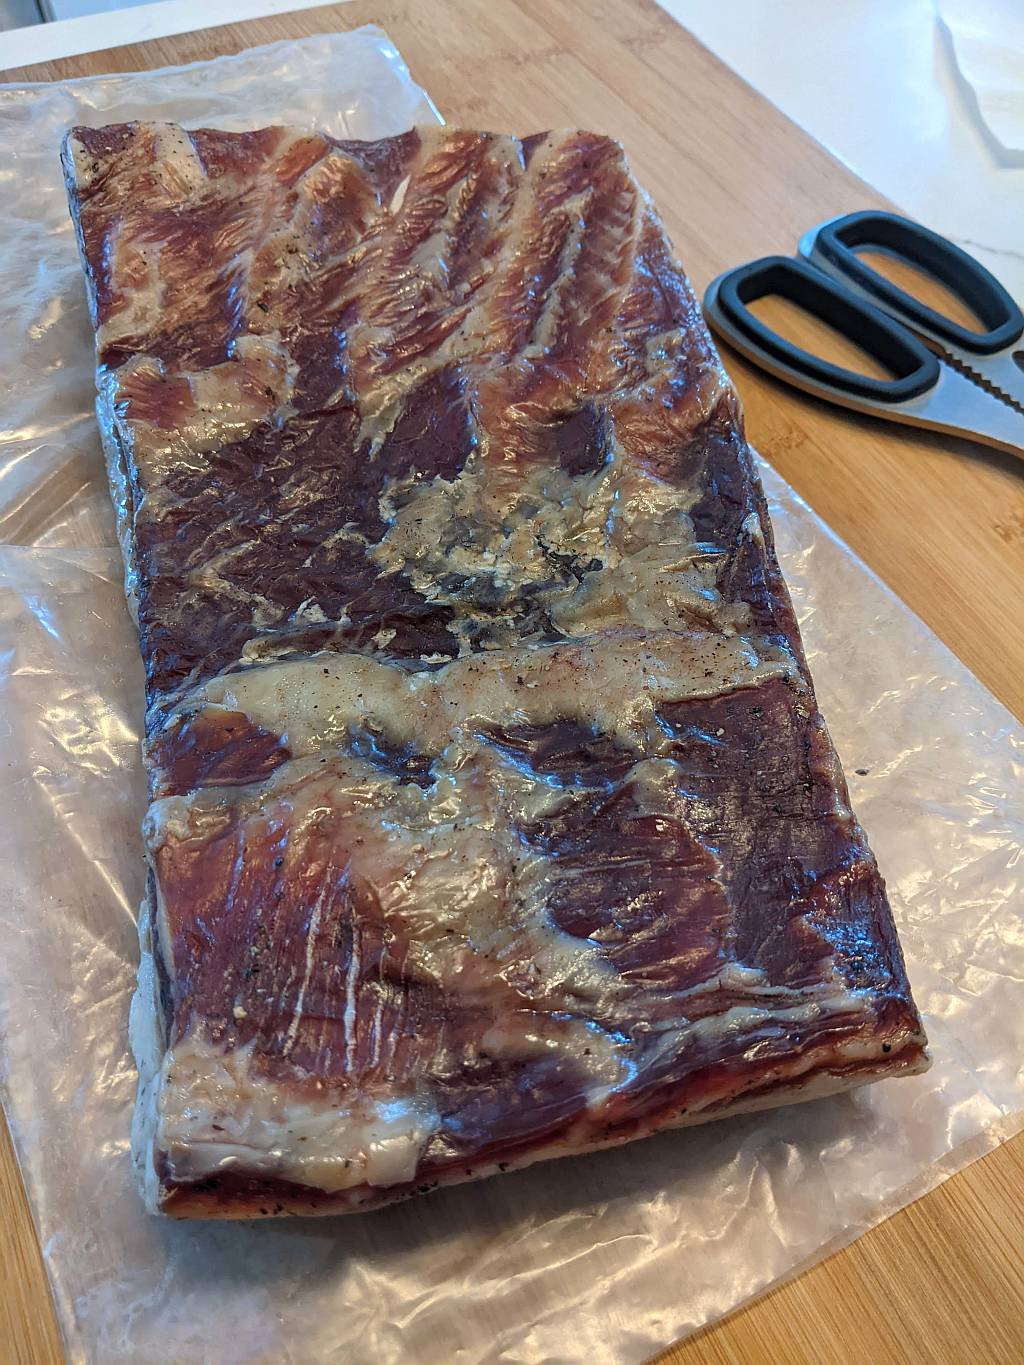
After 18 weeks of curing in the UMAi dry age bag, our pancetta stesa is ready enough. It has lost 35 percent of the starting weight of 1315 grams, finishing out at 853 grams. Lots of patience here.
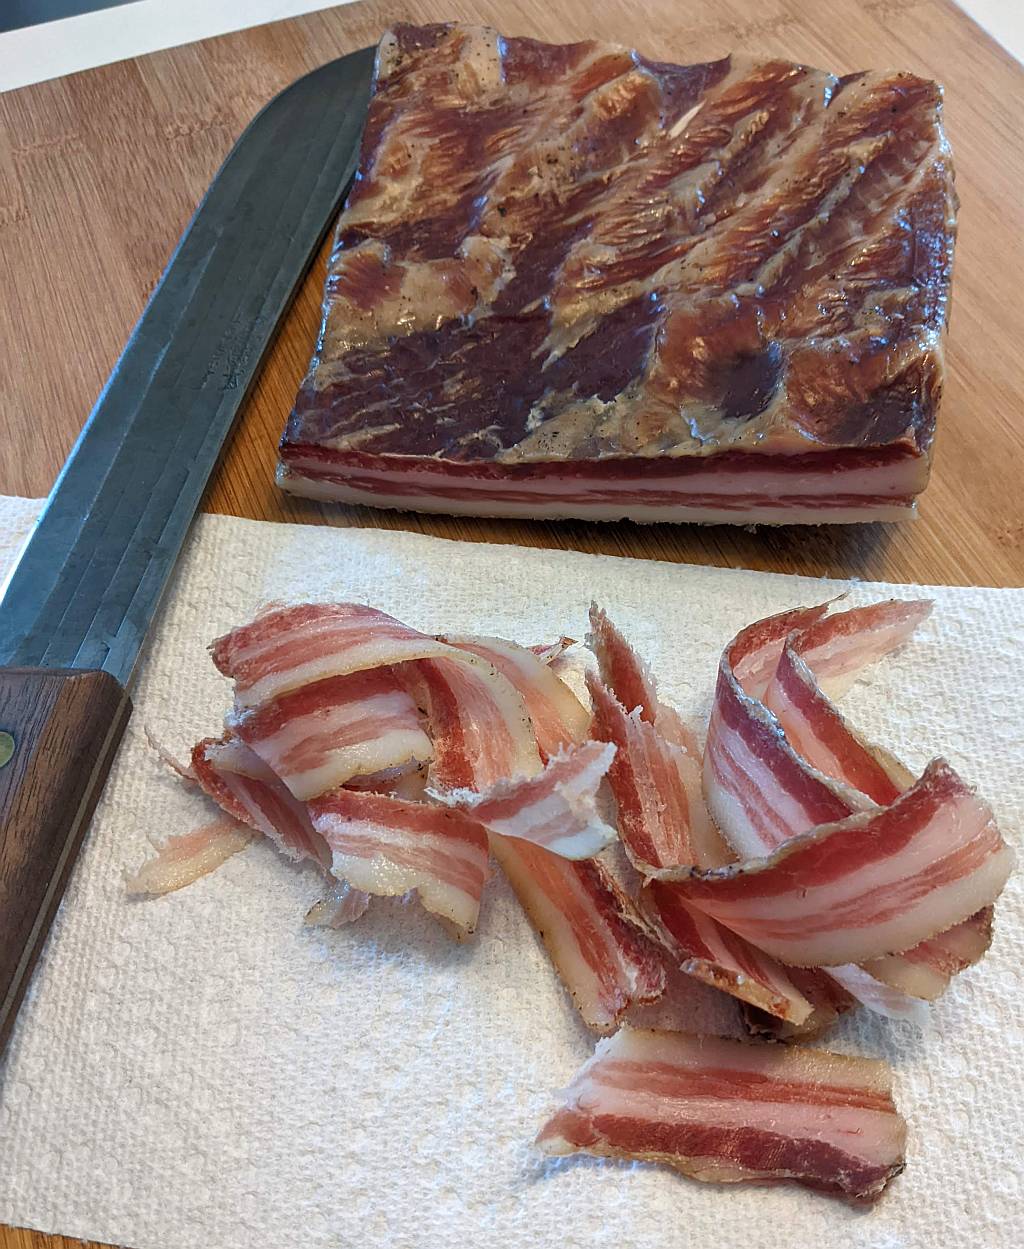
So we cut the pancetta in half to see what the middle looks like. And boy, does it look good. We used our Old Hickory 10 inch butcher knife to shave off a few samples. The pancetta just melted in our mouth. The flavor was spectacular.
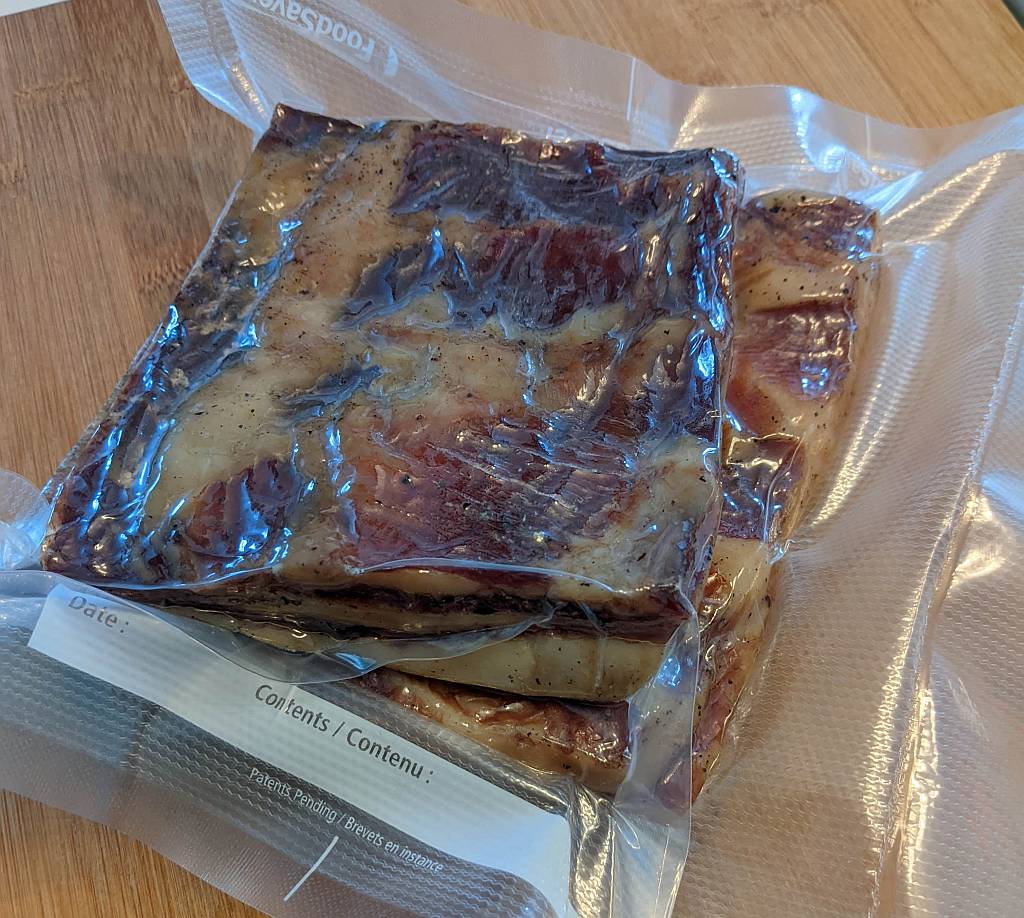
A few websites I saw recommended letting the cured pancetta equalize in a vacuum bag for a couple of weeks. So we sealed up what was left and we’ll give it a go. Now what should we try next. Looking at the UMAi website, the dry cured pepperoni and salami look good. Those take only a few weeks to cure.
Check out my other Kamado Joe and JoeTisserie recipes and links here on my Outdoor Eats page.
One reply on “UMAi Charcuterie Kit Pancetta Project”
I have been looking at the UMAi dry age bags for meats for a while. This looks good, but will wait to see how your project turns out. Keep posting.